Alexandra J. Forsythe
Keep in touch!
  • Home
  • About
  • Work
  • Volunteerism

12V-6V Converter

2/28/2016

0 Comments

 
Picture
To allow me to use an Arduino with a 12-volt battery, I needed to get a converter to 6 volts. Instead of buying one, I thought this was the perfect opportunity to design my own board!

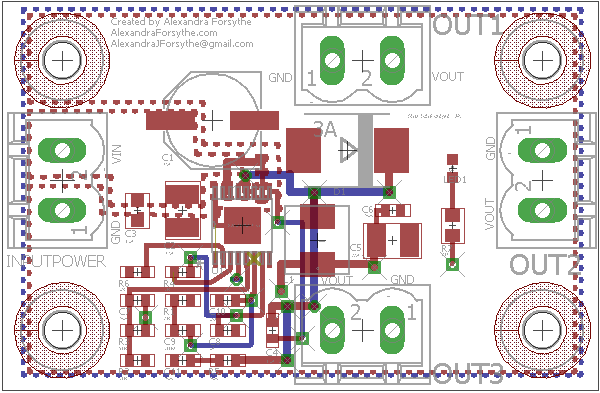
To begin with the design, I looked up the datasheet of my Buck Regulator and examined the suggested layout and how to select the other parts. Then I began the schematic. 

The schematic tool I use is Eagle CAD. To begin, I found all of the parts I had selected with the correct footprints. It took a surprising amount of work to get just the right footprint! Then I connected the components and began the board layout. I first squeezed all of the pieces in as tight as I dared and put everything as close to the parts they connected to as possible. Then I created a ground plane, a 12V plane, and a 6V plane to cut down on the number of traces. I also decided to have 3 outputs so that I could connect multiple loads to a single board. Then I connected everything through traces and vias and voila! The board layout was complete!

Next I had to send the board in for fabrication and I had a solder stencil created. It took 2 weeks for the board to arrive and a few more days for the parts to come in. Once everything was at my house, I began the assembly!

To assemble the board, I first had to clean it with isopropyl alcohol and make sure the stencil matched the copper. Once I was certain everything was in place, I created a jig for the board so the stencil would lay flat on it and the solder paste would be even. Then I put the solder paste on by squeezing it onto the exposed copper areas and then using a card to spread it evenly. Once the solder was on, I placed the components on the board with tweezers and lined all of them up as best I could. Most of the resistors and capacitors had 0402 footprints which is just 1mm in length! When I had finished placing the components I put it in a toaster oven at 450 degrees and let it sit for about 2 minutes. After taking it out and letting it cool, I put the connectors on the board and tested it. It worked!!
0 Comments

R2 Legs

2/21/2016

0 Comments

 
Picture
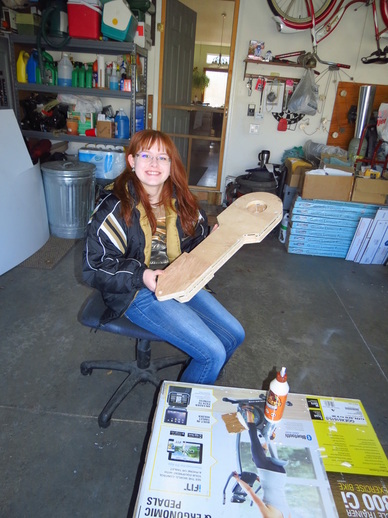
Since I received the R2's leg kits, I decided to put them together before finishing the skins in case I needed to make adjustments to the skins. Some legs require the frame or skins to be sanded down or otherwise altered, and I needed to make those adjustments before finishing the skins.

The legs are made of wood and came in about 7 pieces each. All of the segments had to be aligned perfectly, as even the smallest deviation would ruin the look of the R2. As with the frame, the legs have to be glued together with wood glue and then clamped in place. Because the legs are very large, it took 4 clamps per leg to get them solidly in place! There were also 4 pieces that must be put together separately from the main legs. To get all of the pieces aligned was difficult, but the results will be worth it!
0 Comments

Applying the skins!

2/15/2016

0 Comments

 
Picture
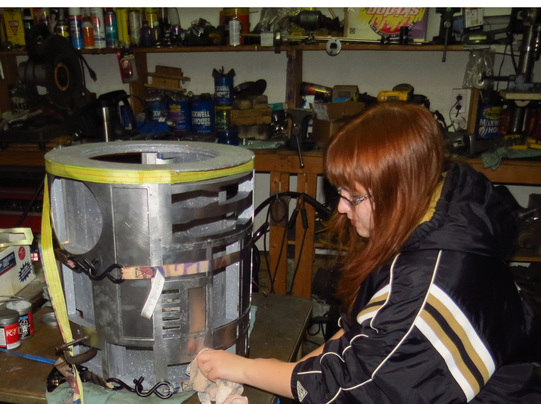
Now for a difficult step: gluing the skins on! I had to make sure while I was gluing to get everything lined up perfectly, or R2 would look shoddily done. For the skins I had to use special glue called PC 7 that is extremely strong.

To apply the glue I had to slather it on, leaving no gaps to ensure a strong bond. Once the gluing was finished I strapped it onto the frame and used a wet rag to remove the excess glue before it dried. The glue will take 2-4 days to dry, so it will be a while until I can move onto the next step: finishing the skins!
0 Comments

Preparing R2's skins

2/1/2016

0 Comments

 
Picture
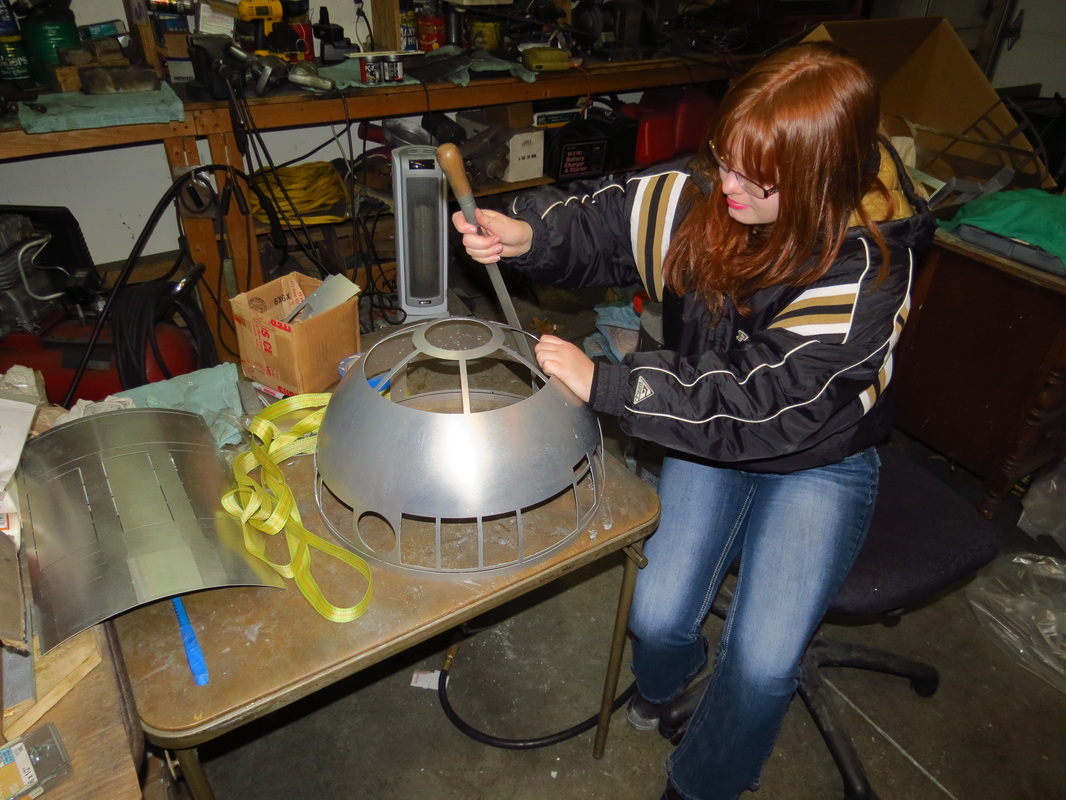
The next step was going to be exciting: I was going to put on the aluminium skins, which are a lot of what makes R2 look like R2! The skins are the outside part of the R2, and they come in four layers: two inner layers (back and front) and two outer layers (also back and front). Before the skins and dome (which comes in two pieces: the inside and outside) can be glued onto the frame, they have to have pieces taken out of them. When removing the pieces I had to be careful to avoid warping the parts or removing the wrong ones, because once a piece has been warped it can be extremely difficult to fix them. Some of the pieces can be twisted out (like a giant model) while others must be sawed out by hand. Because there are over 50 pieces to saw out, it took a long time to remove the pieces! To make the sawing easier I wrapped masking tape around my fingers to help protect them from the saw.

Then the edges and tabs need to be sanded down. One of the tools I used for this (and for the first time ever) was a hand-held belt sander. The belt sander removes the tabs in seconds, but it can easily cut into the skins and make a visible dent in them, so I had to be very careful not to go too far. Once the pieces had been cut out of the dome, it required a special curved file to remove the burrs so the outside part of the dome would fit the inside part, while still ensuring that the dome was not not damaged in the process.


The next step is to glue the skins on.
0 Comments

    Author

    Alexandra Forsythe

    Archives

    November 2022
    October 2022
    July 2022
    June 2022
    April 2022
    February 2022
    November 2021
    September 2021
    June 2021
    March 2021
    February 2021
    January 2021
    December 2020
    November 2020
    October 2020
    August 2020
    March 2020
    September 2019
    August 2019
    June 2019
    April 2019
    March 2019
    February 2019
    October 2018
    September 2018
    August 2018
    July 2018
    June 2018
    April 2018
    March 2018
    November 2017
    August 2017
    July 2017
    May 2017
    April 2017
    March 2017
    January 2017
    December 2016
    November 2016
    October 2016
    September 2016
    August 2016
    July 2016
    June 2016
    May 2016
    April 2016
    March 2016
    February 2016
    January 2016
    December 2015

    Categories

    All

    RSS Feed

Powered by Create your own unique website with customizable templates.