Alexandra J. Forsythe
Keep in touch!
  • Home
  • About
  • Work
  • Volunteerism

3D Printing Parts

4/24/2016

0 Comments

 
Picture
Instead of buying expensive styrene cosmetics for my R2 that can take months (and lots of dollars) to acquire, I am creating my own cosmetics! I assembled a Printrbot 3D printer a year ago, and now I am printing my own R2 parts!

Depending on the part, there can be several challenges when printing parts. One is that the designs are not always completely accurate and may need to be fixed, or they used to be correct but are no longer compatible with my frame and skins and need to be personalized. All of that is before you even start the print!

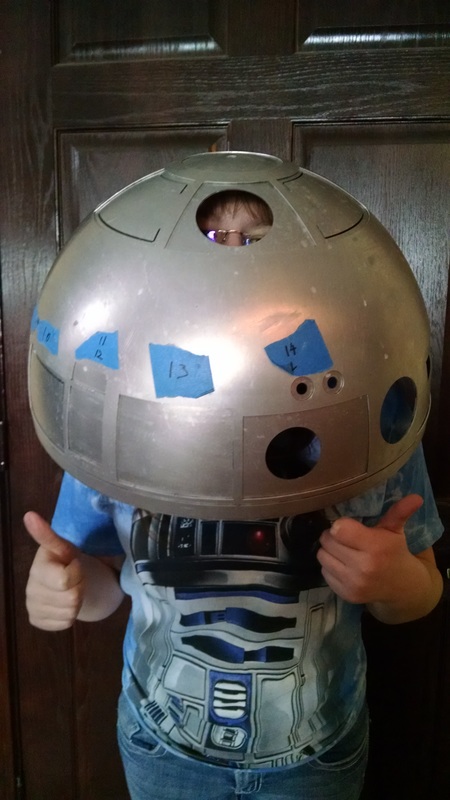
After the print has begun, the first layer of the part must stick to the platform, or the entire print will be ruined. I have found one solution for this: painter's tape! Just place it flat on the bed of the printer (the part the print goes on) and make sure there are no, or almost no, gaps between the pieces of tape, and you're good to go!

Once you've picked a part to print and the printer is ready, you must check the amount of time it takes to print that part. Cosmetics can take anywhere from 6 minutes to 8 hours, so you must ensure that you will not be sleeping through the completion of the print. After a part has cooled, it is much harder to get off of the bed. The printer can also malfunction while printing and should be stopped immediately.  

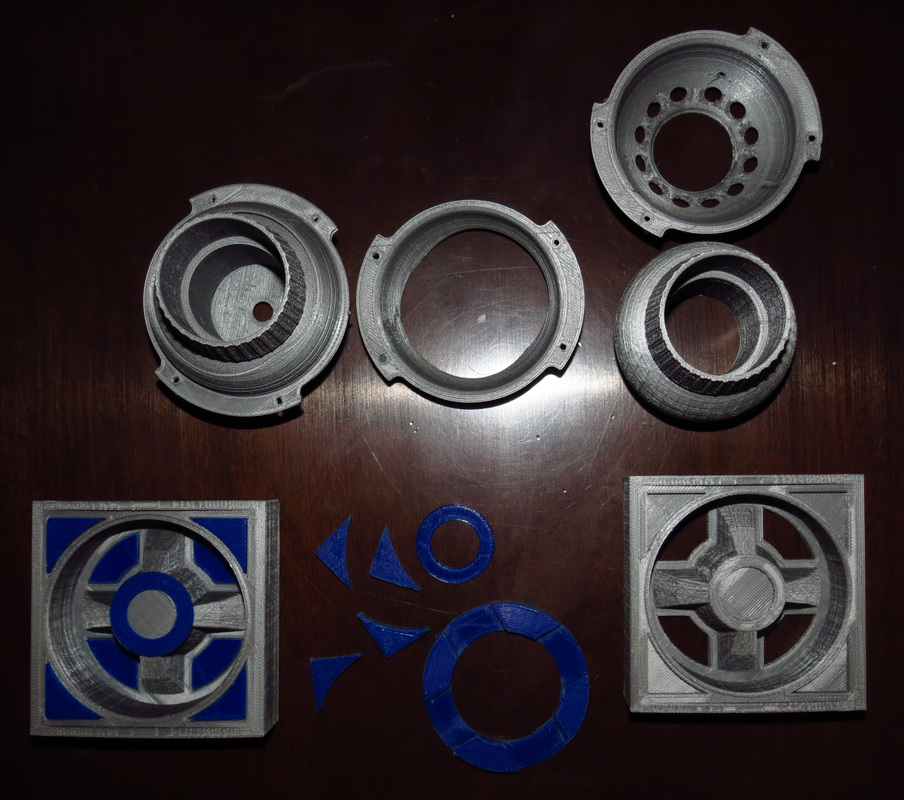
A few of the parts I am printing are the holo-projector eye, the decorative pieces on the arms, and the "coin slots". Each piece has a colorful name, but it's easier to list them according to their descriptions. I'll be loading a video of one or more of the parts as they print on my YouTube channel. Stay tuned!
0 Comments

Sci-TEC Academy 

4/16/2016

0 Comments

 
It's been a good week! On Wednesday I had the Sci-TEC Awards Banquet, and today (Saturday) I was a guest presenter at Purdue. It was an honor to have been invited and I enjoyed speaking with the crowd.

I've been attending Sci-TEC Academy for the past few months, and I have had a blast! Sci-TEC is a collection of challenges spread out over 3 months. Each month, two challenges are given that must be completed within 2 hours. Teams of 3-4 people are randomly assigned or chosen, depending on the challenge. The group that most completely finished the challenge wins!

The first challenge was about structures and fluid dynamics. The challenge was to create the device that held the most products at the steepest angle, then to make an engineering drawing of it. My team got to the steepest angle of 70 degrees.

The second challenge was coding and robots. The coding was an error-check on an Arduino. I had to look through the code until I found what each part of the code did. Then the team had to work together to move a robot through a maze with the top covered. Two members tried to track the robot while another controlled it.

The third challenge was to create an electrical circuit and discuss the reason one particular kind of power (solar, wind, and several others) is the best. In the circuits lab, I had to create several working schematics, build two of the circuits, measure the voltage drop on one of them, and measure capacitance. For the energy sources, I discussed with my team the pros and cons of each type of power.

At the banquet, I received recognition for best circuit design. I received several additional awards at the banquet: Outstanding expertise and experience in STEM; Volunteer service in STEM; and Demonstration of significant leadership in a STEM activity.
0 Comments

Attaching R2's Shoulders and Legs

4/10/2016

1 Comment

 
The next step was to attach the shoulders to R2. Because the legs attach directly to the shoulders, the shoulders must be centered upon each other. If they are not, once the foot drives are attached, the robot could list to one side or the other. 

To prevent this from occurring, the Builder's Club has created a stencil that lines the holes in the shoulder up in exactly the right position. The shoulder itself must be centered first, of course, but with careful measurements it is fairly easy. Once the alignments had been marked, I was able to begin drilling.

The first items I drilled were not on the frame itself; they were the shoulder holes. While gluing they had been clogged, but a quick run through with a drill quickly rectified that. Next were the shoulder holes: six smaller ones and one larger, central one which would permit the wires access to the foot shells. 

After drilling, I tested to ensure that all of the bolts fit properly in their holes and that none of the holes had been at an angle. A few had been at a very slight angle, preventing the bolts from getting to their seatings, but with another quick run of the drill, they all fit. 

Next I attached the legs as a further check. With the aforementioned improvements, they fit! It was just a matter of getting the alignments right.
 
1 Comment

R2 Dome Preparation

4/3/2016

0 Comments

 
Picture
To prepare the dome involved a lot of monotonous but important work. The dome first had to be sanded to look like brushed aluminum, which took many hours to get right. I wanted the lines on my dome to be perfectly straight, so the process involved several days of painstakingly sanding the dome in a precise pattern. After two weeks of sanding, the dome was finally ready for polishing!

The dome polish took far less time to apply than the sanding had taken. All that was needed was to smear some of the polish on and rub it on like "Karate Kid": wax on, wax off. 

Once the polish was applied, I glued the painted panels onto the dome and held them in place with masking tape while the glue slowly dried. Unfortunately, some of the paint came off with the tape, so I will have to repaint it. 

While I was waiting for the dome's glue to dry, I glued several pieces on to the body, so the next step the body needs is painting! In the meantime, I'll make the foot drives, put the legs on, and perhaps finish the dome!
0 Comments

    Author

    Alexandra Forsythe

    Archives

    February 2022
    November 2021
    September 2021
    June 2021
    March 2021
    February 2021
    January 2021
    December 2020
    November 2020
    October 2020
    August 2020
    March 2020
    September 2019
    August 2019
    June 2019
    April 2019
    March 2019
    February 2019
    October 2018
    September 2018
    August 2018
    July 2018
    June 2018
    April 2018
    March 2018
    November 2017
    August 2017
    July 2017
    May 2017
    April 2017
    March 2017
    January 2017
    December 2016
    November 2016
    October 2016
    September 2016
    August 2016
    July 2016
    June 2016
    May 2016
    April 2016
    March 2016
    February 2016
    January 2016
    December 2015

    Categories

    All

    RSS Feed

Powered by Create your own unique website with customizable templates.